Differing from our usual entries, we have decided to try our hand at writing a review of our new favourite (addition) to our cameras- the Polaroid SX-70 Land Camera: Sonar Onestep! For the sake of consistency, we will refer to this camera as the “Sonar SX-70“! 🙂
What made us invest on another instant camera was our love for instant photography! We have been researching and looking for a Polaroid instant camera that runs without batteries! As such, we actually invested in a Polaroid Land Camera 180. However, due to unforeseen circumstances (which we will mention next time), we are unable to detail our experience with that camera.
After further research and reading up on books about Polaroid instant cameras, we decided to look for Polaroid’s famous SLR (Single Lens Reflex) camera: the Sonar SX-70! Thankfully, we found a seller who sold his camera to us for an extremely affordable price. The Sonar SX-70 came with the original box and manual and the owner maintained it very well.
What convinced us to get the Sonar SX-70 are mainly based on many YouTube videos and articles written by professional camera bloggers like Dan Finnen, Snap It See It; just to name a few. Click on their entries for a clearly more professional take on the camera specs and their recommendations!
History and Beginnings
The Sonar SX-70 is a film camera developed in the 1970s, based on the original SX-70 Model. To our knowledge, no company have continued to manufacture the SX-70 series in fresh batches. However, there are websites that sell the original and modified versions! You can even customise and change your own leather skins (purchasable off the Internet) for your SX-70-type cameras. Some modified versions (like MiNT’s SLR670 Series) gives you the flexibility of adjusting your own exposures!
So, for a brief history of the Sonar SX-70:
“The Polaroid SX-70 Original Model was the first instant SLR (single-lens reflex) folding camera from Polaroid, in production from 1972 until the early Eighties. At its launch, Polaroid founder Edwin Land snapped an unheard-of five photos in ten seconds, and its still considered to be one of Polaroid‘s finest achievements, beloved by camera enthusiasts and collectors alike.
Credits: edwinlandphotography.blogspot.com
Artists like Andy Warhol, Ansel Adams and Robert Mapplethorpe instantly spotted its appeal. It was the first camera to use integral film (which is widely available today), and because it folds shut it was easy to carry around, always on hand for a spontaneous photo shoot. It’s a camera that loves the light – things can get a little blurry if shooting indoors, so shoot by a window with the light streaming in. A tripod also helps, or placing the camera on the table or pile of books works just as well.
The Polaroid SX-70 has an exposure dial that allows you to brighten your image – simply turn the dial to the right to lighten things, or to add some darkness turn to the left. You can manually focus the camera, and create a shallow depth of field, meaning that the object in the foreground will be beautifully in focus, while the background is delightfully blurry.”
-Mitchell Beazley, Polaroid: How to take Instant Photos (2015) at p136-137
How It Works!
Below are some images of us testing out the Sonar SX-70!
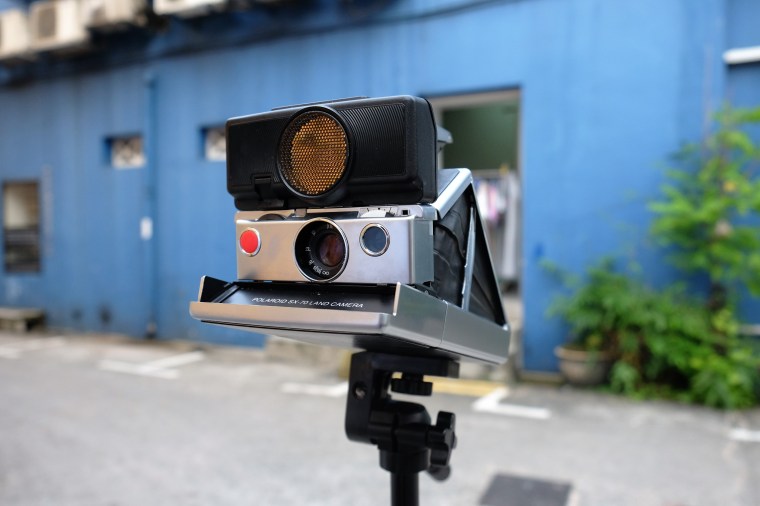
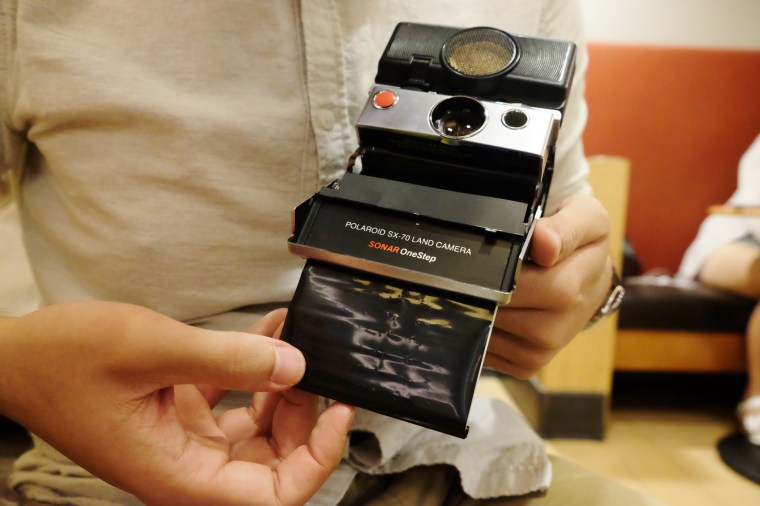
Introducing the Sonar SX-70!
If you have already noticed, the Sonar SX-70 has a peculiar attachment above the lens, differentiating it from the Original Model. This attachment is known as the Sonar; it is able to detect and auto-focus based on sound waves!
According to an expert from the Internet:
“When the shutter button is pressed halfway, a series of ultrasonic chirps is emitted from an electrostatic transducer located under a plate over the lens. These chirps travel to the subject and bounce back to the camera’s receiver, alerting the camera to the subject’s distance, and the lens is turned on a motor to focus accordingly.”
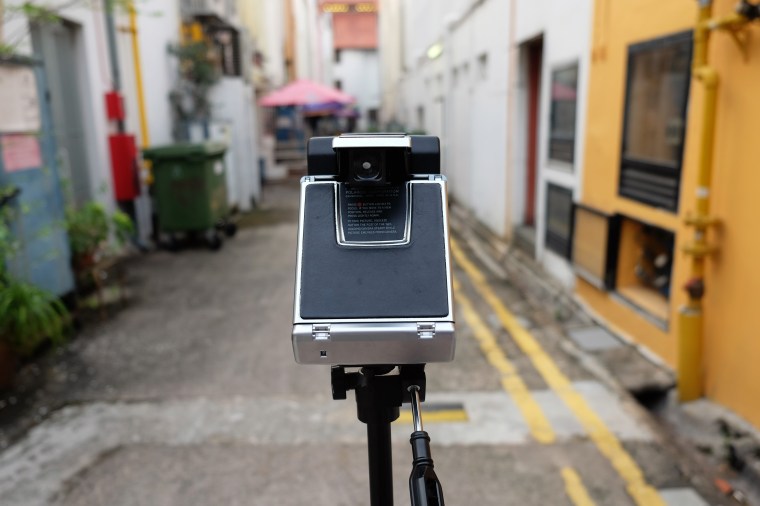
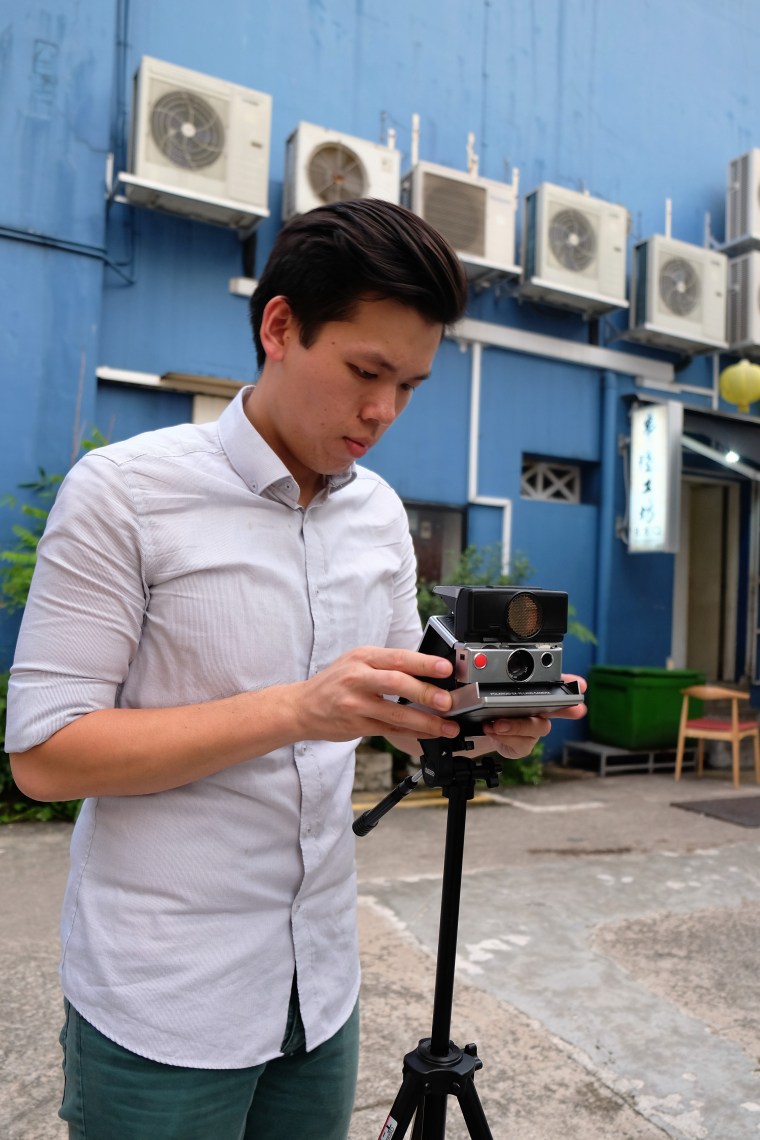
Sandra testing the auto-focus on the Sonar SX-70 by applying light pressure on the button will do; perhaps a prelude to modern cameras?The view from the photographer!Damian fixing the Sonar SX-70 on the tripod!A side portrait of the Sonar SX-70; it honestly still looks amazing even some 30 years on!
The tripod becomes a useful apparatus, particularly for the Sonar SX-70; we will explain our reasons later!
An amused Damian holding up the collapsed Sonar SX-70; the camera (in its folded state) becomes so much more convenient to carry around! This is one of the many selling points during that era of production till now!
The following photos were our first few Polaroids taken with the Sonar SX-70. With initial limited knowledge of the camera or its appropriate working conditions, the outcomes were somewhat unexpected but we were nevertheless enthusiastic!
Polaroids:
This was our first Polaroid taken with the Sonar SX-70; the venue was Chinatown, where shops were set up for the usual Chinese New Year commotion. We observed that the film turned slightly yellow, possibly due to overexposure and humidity (we were not able to protect the film when it came out from the camera).A snapshot of Sandra outside Chinatown’s food street. We learnt that the camera is very sensitive to movements; without the use of a tripod, the Polaroid turned out blurry. The effects of humidity and overexposure resulted in the yellowish tint. After this, we decided to place our Sonar SX-70 on a tripod!A Polaroid of Damian along one of Chinatown’s famed alleys. This photo was taken on a tripod, so we were more confident to play with the manual focus. We figured the photo was overexposed due to our mistaken belief that the evening would require more light (a lesson learnt, it seems). We should mention the yellowish tint seems to be an unfortunate given in our local climate conditions
This next batch of photos were taken on another day with different conditions; having learnt from our initial experience, we were keen to try out the Sonar SX-70 once again!
This manually-focused shot of a flower petal was taken outdoors near Sandra’s workplace. The film was subsequently developed indoors in an air-conditioned environment, which could account for its lack of yellowish tint and even aid the development of film. The camera was placed on a bench, and thus the image was not shaky.One of our favourite photos, this Polaroid of a flower facing the window was taken indoors. Like the above film, it was developed indoors. The camera was placed on the table and focused manually, thus the clear image.This Polaroid was taken outdoors and subsequently developed indoors in the same environment as above. As it was taken during a bright and sunny day, the image was not as overexposed.Damian’s favourite photo of Sandra with her favourite ice gem cushion! Here, a tripod is used to stabilise the camera, and without a frog tongue, we had to take precautions to ensure the film did not get too overexposed. It was not as yellowish as the other photos.
We also noticed that there were streaks of light at the bottom of each Polaroid… We love it!Although it may be due to the chemicals of the Impossible films we were using, this exemplifies the raw and unique taste to the Polaroid! The Sonar SX-70 is truly impressive for its time 🙂
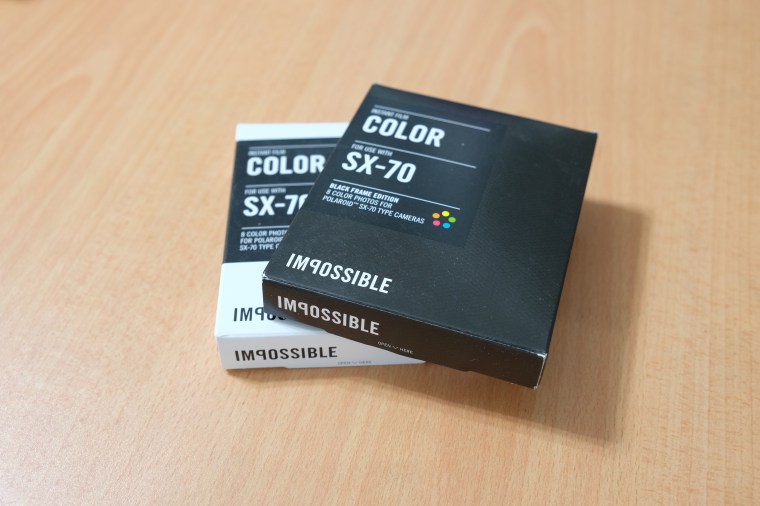
Impossible Project Films:
Before we proceed on with the accessories, we would like to point out that the films we have used for the Sonar SX-70 are made by the Impossible Project!
Here are the two packs what we bought. Each pack comes with 8 films. The retail price in Singapore costs roughly about $33-$42. It is admittedly expensive, but the results are totally worth it!
Previously, Polaroid used to make their own film known as the Time-Zero Supercolour (quite a fancy name for a film).
Unlike the Impossible Project film packs, the original Polaroid Time-Zero Supercolour Film comes with 10 films per pack. However, ever since Polaroid’s bankruptcy and Impossible Project re-manufacturing films for Polaroid cameras (the owners of Impossible Project bought over the last functioning Polaroid factory and took over from there), the film pack was reduced to 8 films per pack. Nevertheless, we are still very happy that Impossible Project is around so that old Polaroid cameras can still be utilised!
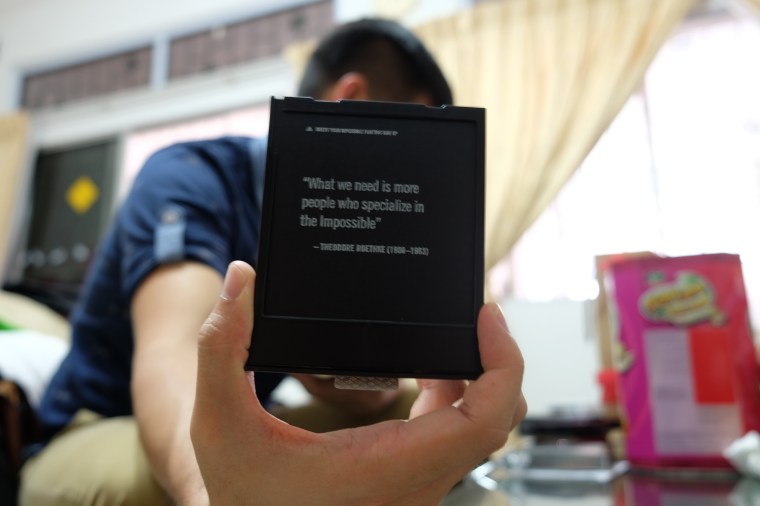
Here’s Damian loading the film! Although we said that the Sonar SX-70 does not use batteries, each individual Impossible Project Film packs come with a battery, which ejects the Polaroid out of the camera.We love the quote on the blank sheet in the film pack; Impossible Project packaging is unique and brilliant!
As you can see, we bought the SX-70 films. Because Impossible Project Film is very sensitive to light, we have to reduce our exposure setting every time we take a photo. We later found out with a Neutral Density (ND) filter, we are able to use the 600 films – which is better and slightly less expensive! We have yet to test those out …. but first, let us move on to the accessories we used!
Accessories- Mint Flash Bar 2
Our first accessory we decided to buy is the Flash Bar by Impossible and MiNT, as the Sonar SX-70 is not able to take clear shots indoors because of low lighting. It is not necessary, but we decided to get one because proper lighting is important to us!
Unboxing of the Flash Bar by MiNT! Thanks to Polaroidtipsg for the delivery!
The Flash Bar comes with the following items:
User manual;
Powered by 2 AAA cells (included);
Delivered with colour filters in hot pink and chartreuse;
Attached external flash through 2.5 mm audio jack (not included);
The charging time is reduced dramatically by more than 15 seconds;
An auto-sleep function has been added for saving battery; and
Special ND-compensation mode allowing usage of 600 ASA film in SX-70 cameras.
Putting batteries in the Flash Bar! Although one does not need to use the batteries for Sonar SX-70 (as it is provided in the film pack, the Flash Bar does require some.Attaching the Flash Bar at the TOP port (already built-in on the Sonar attachment)! We love how modern technology and inventions such as the electronic flash bar are compatible with the good old Sonar SX-70!The Flash Bar is powered by 2 AAA batteries, and it comes with two colour filters – hot pink and chartreuse! The amazing thing about this feature is the ability to ‘control’ the power of the flash – half or full!Get ready… get set… shoot!
Polaroids with Flash Bar:
Here are some Polaroids we have taken with the Flash Bar! We have not yet explored the coloured filters; however the film pack we used have black frame, as created by Impossible Project! 🙂
To start off our comparison, here is Damian with 5 different coloured ice gem biscuit cushions (no flash)! This Polaroid was taken indoors.Damian holding 5 different coloured ice gem Biscuits cushions, taken indoor and with full flash! Here the flash is so bright that we are unable to see the different colours on the cushions. However, Damian’s face is so clear, just like a photograph!Here’s Sandra sitting on the stairs holding three pineapple tart cushions! This Polaroid was taken indoor with full flash, at a further distance than the one above. As a result the Polaroid is well-lit overall!Here is Damian holding the Tu Tu Kueh cushion with half flash due to the outdoor lighting! This Polaroid was taken outdoors around 7pm.
We love how our Polaroids turned out when using the Flash Bar. Our images became a lot clearer and more focused and we can conveniently take indoor photos! Unfortunately, we can only hope to control the aperture (despite the Sonar SX-70 having manual focus) so that we can take indoor Polaroids with natural ‘indoor’ lighting 😦
We have yet to try the colour filters with the flash bar. Stay tuned and we will keep you posted about how those images turns out!
Accessories – Frog Tongue
The word ‘Frog Tongue’ in association with a camera may sound fairly odd. Initially, we thought so too; however this accessory definitely fits its purpose and its name!
After further research and experience with taking photos with our Sonar SX-70, we decided to invest on a SX-70 Frog Tongue by Impossible Project. The purpose of a Frog Tongue is to ‘shield’ the Polaroid when it is being ejected from the Sonar SX-70. This is particularly important, so as to shield the Polaroid from natural sunlight, as well as to preserve the quality of the image taken!
As pictured below, we initially struggled with installing the Frog Tongue onto our device. We had no idea where the Polaroid ejected, nor did we want to be too rough with our beloved camera! Nevertheless, after reading the instructions and watching many Youtube videos, we figured out and… tadah:
As you can see, the flap of the Impossible Project Frog Tongue comes out from the bottom of the camera!The urban black Frog Tongue rolls out with the Polaroid so as to shield it when it is ejected!The rolled-up Frog Tongue sticking out from the bottom of the Sonar SX-70!Frog Tongue in action!
Polaroids with Frog Tongue (without the Flash Bar):
Here are some Polaroids we have taken with the Frog Tongue! We used the Impossible Project Second Factory Colour Film with Coloured Frames for SX-70 cameras, and we LOVE how our Polaroids have turned out (despite them belong technically ‘rejected films’)!
This photo of a plant was taken outdoors around 4pm, and subsequently developed in an air-conditioned room.Another similar shot taken outdoors, developed in an air-conditioned room! We love how the foreground has (what we call) the watercolour effect, because the colours seem to blend well together!
To reiterate, these photos are taken with Second Factory films! And yet, there are no harsh blue lines/exposures along the side of the Polaroids. The Frog Tongue is truly a good investment – it really upholds the quality of the photos and prevents the Polaroid from being overexposed!
Conclusion
We hope that this entry will give you a taste of what the Sonar SX-70 does, and why we love it! Although most of our comparisons are based on numerous variables – i.e, different conditions, different films, different development process, different times of the day – to test out the products, we felt that this was a quick way to decide and decipher whether these camera tools and accessories helped to produce images that we expected! Of course, there are unexpected aspects of the film development that may nevertheless brings a unique twist to the Polaroid!
There are so many accessories that have been developed for the SX-70, like the Mint Lens Kit (which we bought), the ND Filter (in its different variations), and so on. We have not reviewed them in this entry as we are still in the process of exploring these tools and accessories! We also hope that more vendors will bring in Impossible Project Films to Singapore!
Do check out our Instagram for more uploads of our Polaroids and instant films! We had a lot of fun connecting and learning from other Instagram users, who are also using the Sonar SX-70! Through further learning experiences and exposure, we also hope to find ways to overcome the humidity in Singapore, as well as adapting to the external conditions to achieve the best Polaroid!
Till next time,
Damianwithsandra
NOTE: We will be updating our “Cameras We Use” page this week… So keep a look out for it! 🙂


4 thoughts on “Polaroid SX-70 Land Camera: Sonar Onestep”